Making an Egg
Yoohoo! This isn’t a cooking tutorial. Usually, my boyfriends make me dinner or take me out to a restaurant, so I’m kind of a lousy chef. It’s a 3D art tutorial! It’s part of my egg series. I started that series to be something simple for me to do, like a 3D doodle template. This will be a great introductory project for anyone out there wanting to learn more about 3D art.
I’ll be working in Blender today. The program is free, but it unfortunately doesn’t work on mobile (feel free to keep reading if you’re curious though!). You can download Blender here and you’ll need the blank egg I’ve prepared for you too.
When you open the blend file it should look something like this:
I know it might look overwhelming, but you won’t need to worry about like 90% of the buttons here. I’ll walk you through step by step.
Step One: Make a New Image Texture
I’ve already set up seams and unwrapped this model, so it’s ready to be painted. In the bottom half where it says “Image Texture”, click the “+ New” button to make a new image. You can name it whatever you want and set the color to whatever you’d like to have as a base. I named the texture “Eggzample2” and set the base color to a light pinky orange. Width and Height are 1024 x 1024 pixels. More than enough detail for a simple egg like this.
Then click the New Image button and you’re almost ready to paint!
Step Two: Painting your egg
Now let’s go back to the top half of the screen and see what we just did. Left click on your egg. Then press Z on your keyboard. It should look like this:
Click on Rendered to change the view from Solid to rendered so it shows the image we just created. It will show up as whatever color you chose, my egg looks like this:
egg
We’re almost ready to give her a cute little face! Click on the top left corner where it says “Object Mode” and change it to “Texture Paint”
Don’t worry about the other 4 Modes
As soon as you press that you’ll get lots of different brush options. You can test them out if you’d like, but I’ll primarily be using “Paint Soft” to apply color with soft edges, “Smudge” to push color around, and “Blur” to soften some edges even more.
Next to where it says “Paint Soft” there are two rectangles of color. You can click on either of these to set the colors to whatever you want, and press the X key on your keyboard to quickly swap between the two.
The radius slider controls how big the brush will be, which you can see with a circle indicator. You can quickly make the radius bigger and smaller with the ] and [ keys respectively.
You can zoom in and out by scrolling up and down, or pressing Ctrl+ and Ctrl-
You can undo with Ctrl Z, but there’s no way to redo in Blender so be careful.
The strength brush affects how much color each click applies. 1 will be total color and 0 will do nothing. I like to work in about .1 strength so I can build up color.
By default, it’s set to paint symmetrically side to side. Anything you paint on the left will be copied to the right and vice versa. Don’t worry about changing that for your first egg.
Here’s a timelapse of this egg paint. I painted it in about 20 minutes and sped that up. Normally I’d spend a little bit more time and wouldn’t necessarily finish an egg in one sitting, but I wanted to just get one done quick to show you:
Step 3: Saving your work!
If you don’t save the image you just painted, it will disappear forever when you close the program. To save, you’ll go back to the bottom half of the screen.
Click the little shiny orb symbol to get a drop down menu and change it from “Shader Editor” to “Image Editor”. Should look like this:
If it loads the wrong image you can click on the little icon that looks like a square with a triangle and circle inside it to find the texture you just made.
We want Eggzample2 (or whatever you named your texture). EggZample is an older texture I made.
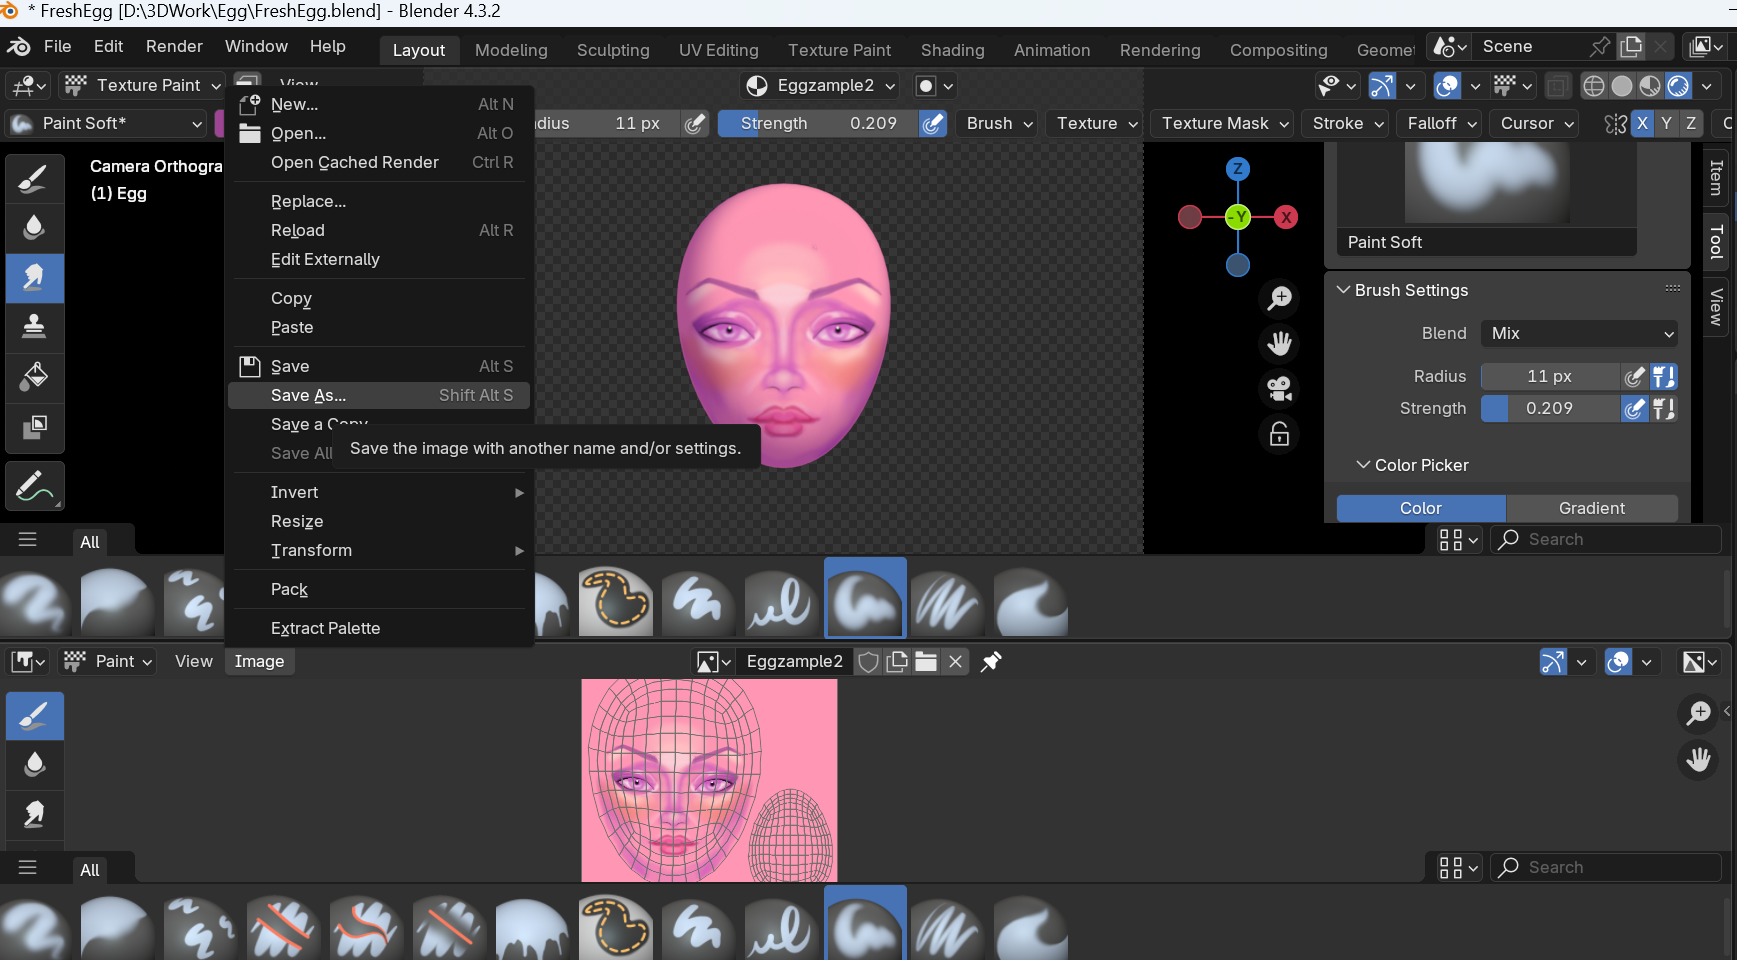
Then you’ll click where it says Image and save as to save your texture.
If you make any other changes and want to save them, you can just use the regular save button.
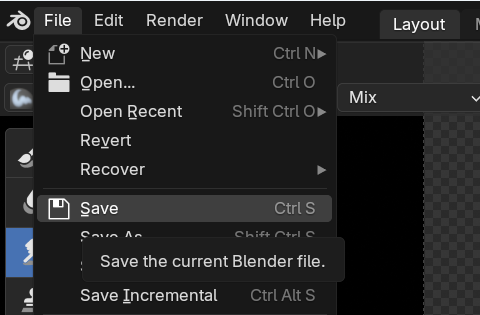
Then you’ll want to save the changes you made to the blend file. Click Ctrl S together on your keyboard or go to File and click save from that menu like this:
And voila, you’ve painted an egg! Hit Render and render image to get a nice picture of your egg like this:
egg
If enough people are interested, I’ll make more parts to this series where I show you how to model simple eyelashes and hair for your egg. For now though, toodeloo!
If you make any eggs I’d love to see them. My email is me.flaminia@flaminia.me


